Rig 1: A UI Designer & Engine
For anyone interested in graphics and in the design of user interfaces (UIs) I hope I can invite you to take a look at our release of Rig 1 today. Rig 1 is the start of a new design tool & UI engine that I've been working on recently with Neil Roberts and Damien Lespiau as a means to break from the status quo for developing interfaces, enabling more creative visuals and taking better advantage of our modern system hardware.
In particular we are looking at designing UIs for consumer devices with an initial focus on native interfaces (device shells and applications), but also with an eye towards WebGL support in the future too.
With Rig we want to bring interactivity into the UI design process to improve creativity and explore the possibilities of GPUs beyond the traditional PDF drawing model we have become so accustomed to. We want to see a design work flow that isn't constrained by the static nature of tools such as Photoshop or mislead by offline post-processing tools such as After Effects. We think designers and engineers should be able to collaborate with a common technology like Rig.
Lets start with a screenshot!
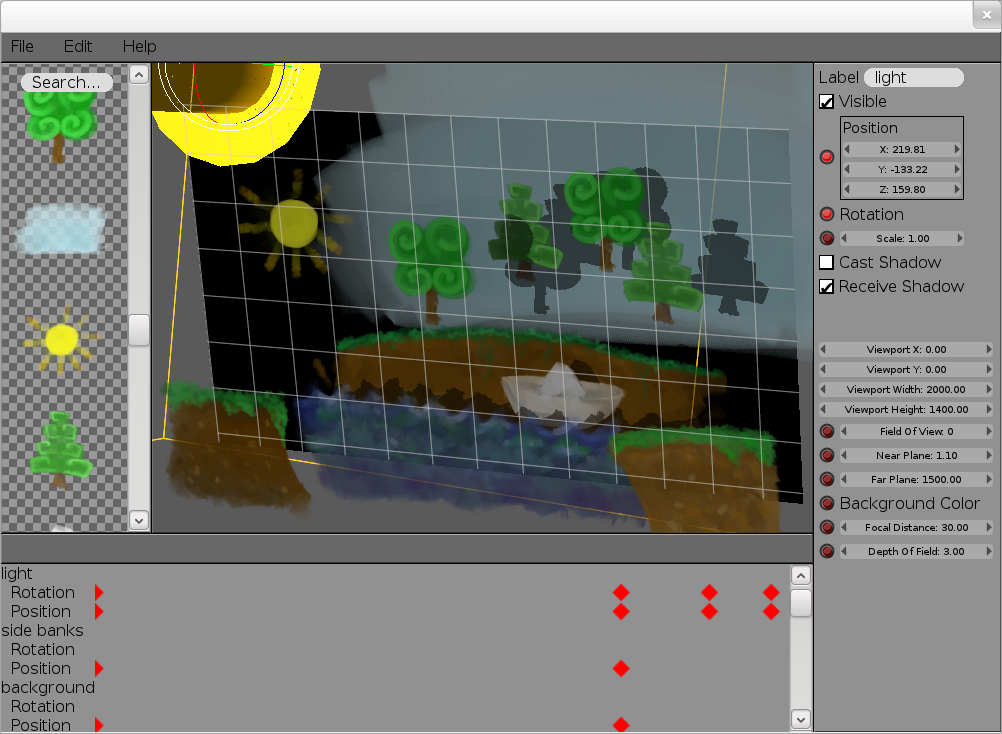
This gives you a snapshot of how the interface looks today. For Rig 1 our focus has been on bootstrapping an integrated UI design tool & rendering engine which can showcase a few graphics techniques not traditionally used in user interfaces and allows basic scene and animation authoring.
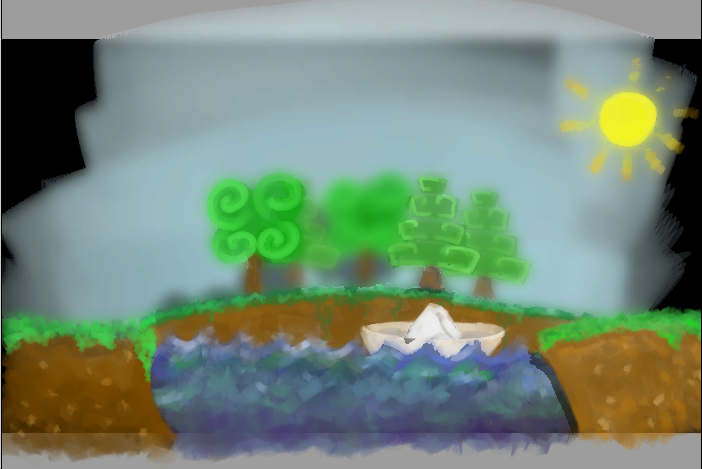
If you're wondering what mud, water, some trees and a sun have to do with creating fancy UIs; firstly I should own up to drawing them, so sorry about that, but it's a sneak peek at the assets for a simple "Fox, Goose and Corn" puzzle, in the style of a pop-up book, we are looking to create for Rig 2.
I'd like to highlight a few things about the interface:
It all starts with assets:
On the left of the UI you see a list of assets with a text entry to search based on tags and names. Assets might be regular images, they could be 3D meshes, they could be special ancillary images such as alpha masks or normal maps (Used for a technique called bump-mapping to give a surface a perturbed look under dynamic lighting).Assets don't have to be things created by artists though, they might also be things like scripts or data sources in later versions of Rig.
The basic idea is that assets are the building blocks for any interface and so that's why we start here. Click an asset and it's added to the scene and assets can sometimes even be combined together to make more complex things, which I'll talk more about later.
Direct manipulation:
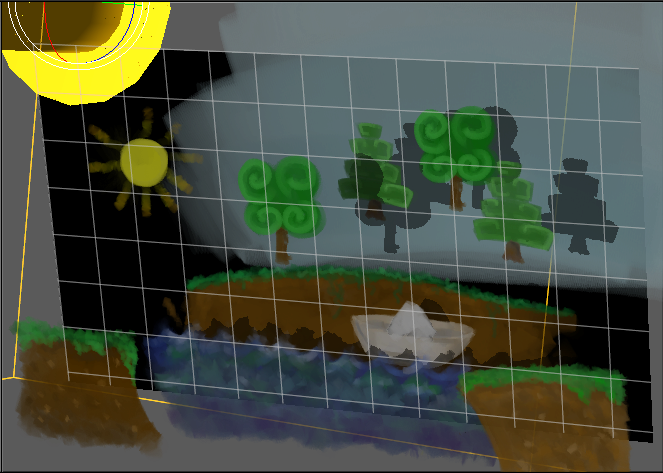
In the center is the main editing area where you see the bounds of the device currently being targeted and can directly manipulate scenes for the UI being designed. We think this ability to directly manipulate a design from within the UI engine itself is going to be a cornerstone for enabling greater creativity since there is no ambiguity about what's possible whenyou're working directly with the technology that's going to run the UI when deployed to a device.
These are the current controls:
- Middle mouse button to rotate the whole scene
- Shift + middle mouse to pan the scene
- '+' and '-' to zoom in and out
- Left click and drag to move an object (object should not already be selected)
- Left click and drag a selected object to rotate
- Ctrl-Z and Ctrl-Y for Undo and Redo respectively
- Ctrl-S to Save the current document
In-line previews...
Currently this is done by pressing the 'P' key.
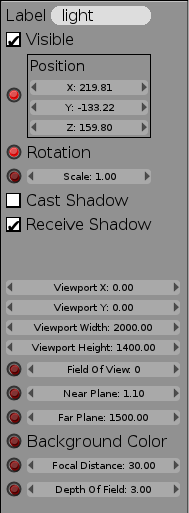
Editing properties:
A scene in Rig is comprised of primitives called entities which basically just represent a 3D transformation relative to a parent. What really makes entities interesting are components which attach features to entities. Components can represent anything really but examples currently include geometry, material, camera and lighting state.
When you click an asset and that's added to the scene, what actually happens is that we create a new entity and also a new component that refers to the clicked asset which is attached to the entity. The kind of component created depends on the kind of asset you click. If you click an asset with an existing entity selected, that lets you build up a collection of components attached to a single entity.
Each component attached to an entity comes with a set of properties. The properties of the currently selected entity and those of all attached components are displayed on the right hand side of the interface. The effect of manipulating these properties can immediately be seen in the main editing area.
The little red record button (
 ) that you can see next to some of the properties is used to add that property into the current timeline for animating...
Timelines:
Once you've built up a scene of Entities then authoring animations is pretty simple. Clicking the red record button of a property says that you want to change the property's value over time and a marker will pop up in the timeline view at the bottom. Left clicking and dragging on the timeline lets you scrub forwards and backwards in time. If you scrub forwards in time and then change a recorded property then a new marker pops up for that property at the current time. Left clicking markers lets you select and move marks. Property values are then automatically interpolated (tweened) for timeline offsets that lay in between specific markers.These are the current timeline controls:
- Left click lets you scrub the current timeline position
- Left clicking markers lets you select marks; Shift + Left click lets you select multiple markers
- Left clicking and dragging lets you move selected markers left and right
- Delete lets you remove markers
- Ctrl-Z and Ctrl-Y also let you undo and redo timeline changes
Effects
We started with a fairly conservative set of effects for Rig 1, opting for effects that are well understood and widely used by game developers. This reduced some of the initial development risk for us but there is a chance that our choices will give the impression we're simply trying to make UIs that look like console games which isn't the intention.Modern GPUs are extremely flexible pieces of hardware that enable an unimaginably broad range of visual effects, but they are also pretty complex. If you really want to get anything done with a GPU at a high level you quickly have to lay down some constraints, and make some trade-offs.
The effects we started with have a long history in game development and so we know they work well together. These effects emphasize building photorealistic scenes but there are lots of non-photorealistic effects and generative art techniques we are also interested in supporting within Rig. Since these are more specialized we didn't feel they should be our first focus while bootstrapping the tool itself.
Lighting
Although I don't envisage using glaringly 3D models for core user interface elements I think there could be some scope for more subtle use of 3D models in live backgrounds for instance.
Shadow mapping
Shadows can be used to clarify how objects are arranged spatially relative to one another and we think there's potential for user interfaces to use depth cues perhaps to help define focus, relevance or the age of visible items but also for purely aesthetic purposes.
Bump mapping


This video shows the gist of what this effect enables, though for a more realistic use case I think it would deserve a more hand-tuned bump map, and more suitable texture mapping.
Alpha masks

Depth of field
This example video alludes to using the effect for moving focus through a list of items that extends into the depths of the screen.
Status
Our next technical aim is to support application logic, basic input and the ability to interactively bind properties with expressions. As a milestone benchmark we plan to create a Fox, Goose and Corn puzzle, chosen due to its simple logic requirements and no need to fetch and process external data.
The technical aim after that is to support data sources, such as contact lists or message notifications as assets where we can interactively describe how to visualize that data. The benchmark for this work will be a Twitter feed application.
I'm particularly looking forward to getting our ideas for data integration working since the approach we've come up with should allow much greater creativity for things like showing a list of contacts or notifications while simultaneously also being naturally efficient by only focusing on what's visible to the user.